
 |
| I documented my attempts at making hedgerows primarily so I could remember how to make more if my technique worked. Having seen many tutorials online already I thought I saw room for improvement. I'll let you be the judge. (Battle mat is the Cigar Box - Plush - Just Fields one that came out recently. See more of that, and the finished hedges here. |
 |
| Two pieces of basic kit for any modeler is the white glue and the lolly stick. I have a bigger bottle of glue I feed into this smaller one for more dexterous handling. |
 |
| Save those old sprues gentlemen! These all had flat round protuberances along the lengths into which I drilled a central hole with the hand drill at right. You'll see why below. |
 |
| White glue was perfectly adequate for this part. Allow time for adequate drying. |
 |
| Further, I had Woodland Scenics cut and broken stumps lying around for ages and unused so thought I'd add these in to break up the lengths. |
 |
| Part II - The Hedging: Scotch Brite scouring pads cut into one inch strips then folded in half and hot glued to the sticks. This had to be done almost in one step as the hot glue dries fairly quickly. First I cut the the inch strips then found appropriate lengths between the stumps and what will later be trees. Hot glue going, I folded and pressed them along the lengths. I was here concerned about leaving space on either side of the hedge - next time I won't bother - let the hedge go the the very edge of the stick. They are a bit lower that way but I think it's a better product then trying to then grass up the very narrow strips of ground that remain after. |
 |
| I only cut irregularities in the hedge tops to a minimal degree - mostly rounding edges off at the ends rather than the tops. Glue had penetrated fairly deep up the interior of the hedge such that it didn't make for easy cutting. |
 |
| Stumps, trees, rocks and later, other bushes, break up the lengths. Here is the start of a stone fence here where the hedge grew inadequately. It is also evident here why drilling the sprue was necessary. |
 |
| I've had these odd metal trees from what was a HO Scale Woodlands Scenics "Hedge Row" set but they seemed too tall and were loose, dusty and without instructions or a means of basing them. Better to make them small saplings or larger bushes. |
 |
| Also a few odds and ends from outside - washed and dried first of course. |
 |
| If someone were to tell you that you'd get eight feet of hedges out of this project, you'd think that'd be plenty. On the contrary, I should have probably tripled this amount. To enclose a single large field takes about half of what I made here in these sixteen 6" lengths. |
 |
| Finishing up ... |

 |
| Everyone has a container of loose flocking debris in various colors and textures. Here I applied some of this scrap to conceal the sprue and to add some continuity with the hedges themselves. Probably helps these somewhat delicate lead tress have a firmer base as well. |
 |
| Note the one with the open entry - exactly one cavalry base wide. With modeling paste, I created some ground for the logs to rest upon. |

 |
| Part III: The Painting: Rustoleum Camouflage Brown spayed over the lot. I didn't worry too much about penetrating the green scour pad - seems it'd be ok if that came through if I missed a spot. And because I wanted the bases to be dark brown, I didn't miss anything. |
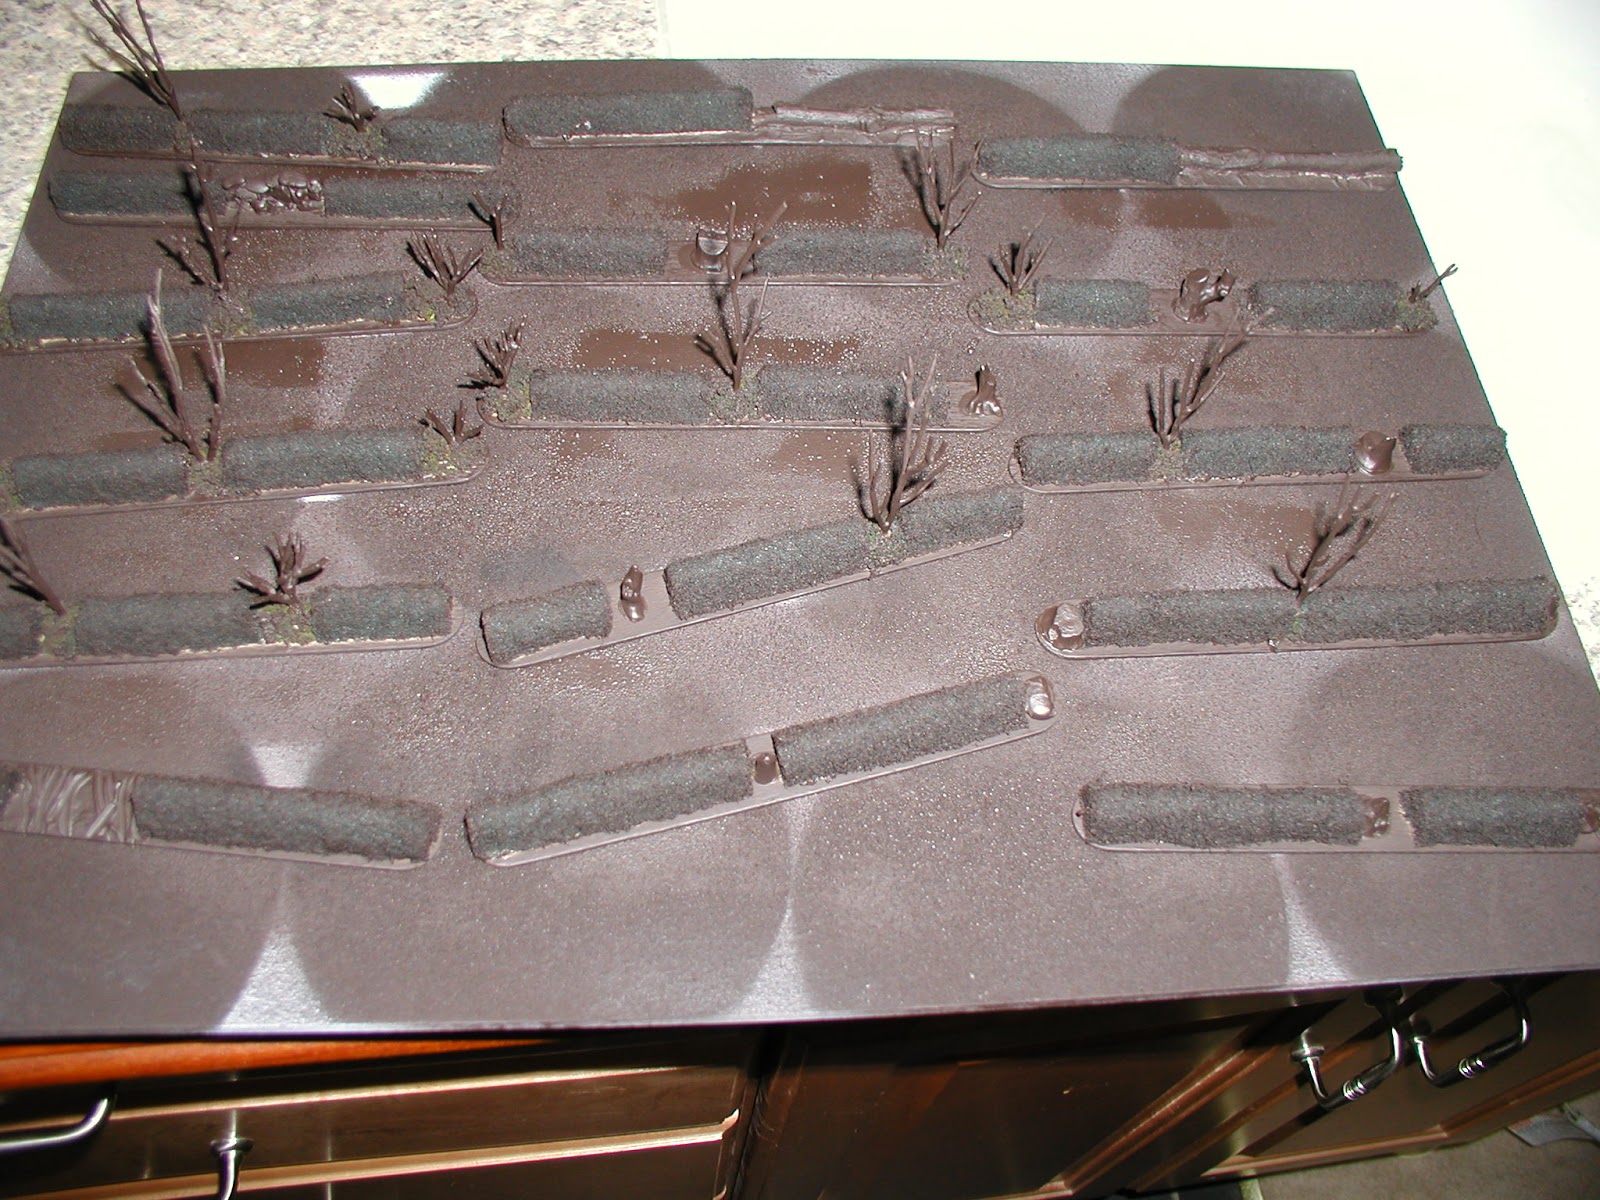 |
| There's no reason for fancy hobby sprays for this kind of thing. Please save your money here. |


 |
| On to painting. Wood furniture is brown, but natural tree trunks are often brown tinged variations on grays. Cheap craft paints here. Again, save your Masterclass paints for the miniatures. |


 |
| Tracks, also in modeling paste, grooved in with a toothpick. Note to self: when you do go back and make more of these, do a couple with a small gate. |
 |
| Piled stone wall - this does not look authentic to me and I won't do it again. |

 |
| Part IV - The Flocking: Super Leaf! I love this product! It appears on close inspection, to be colored and shredded plastic bag material. Tacky glue for the bulk but I needed to get into tighter spaces with the white glue - especially around the stumps. Also, I used the white glue to spot-fill places I missed without already disturbing the tacky portions. |
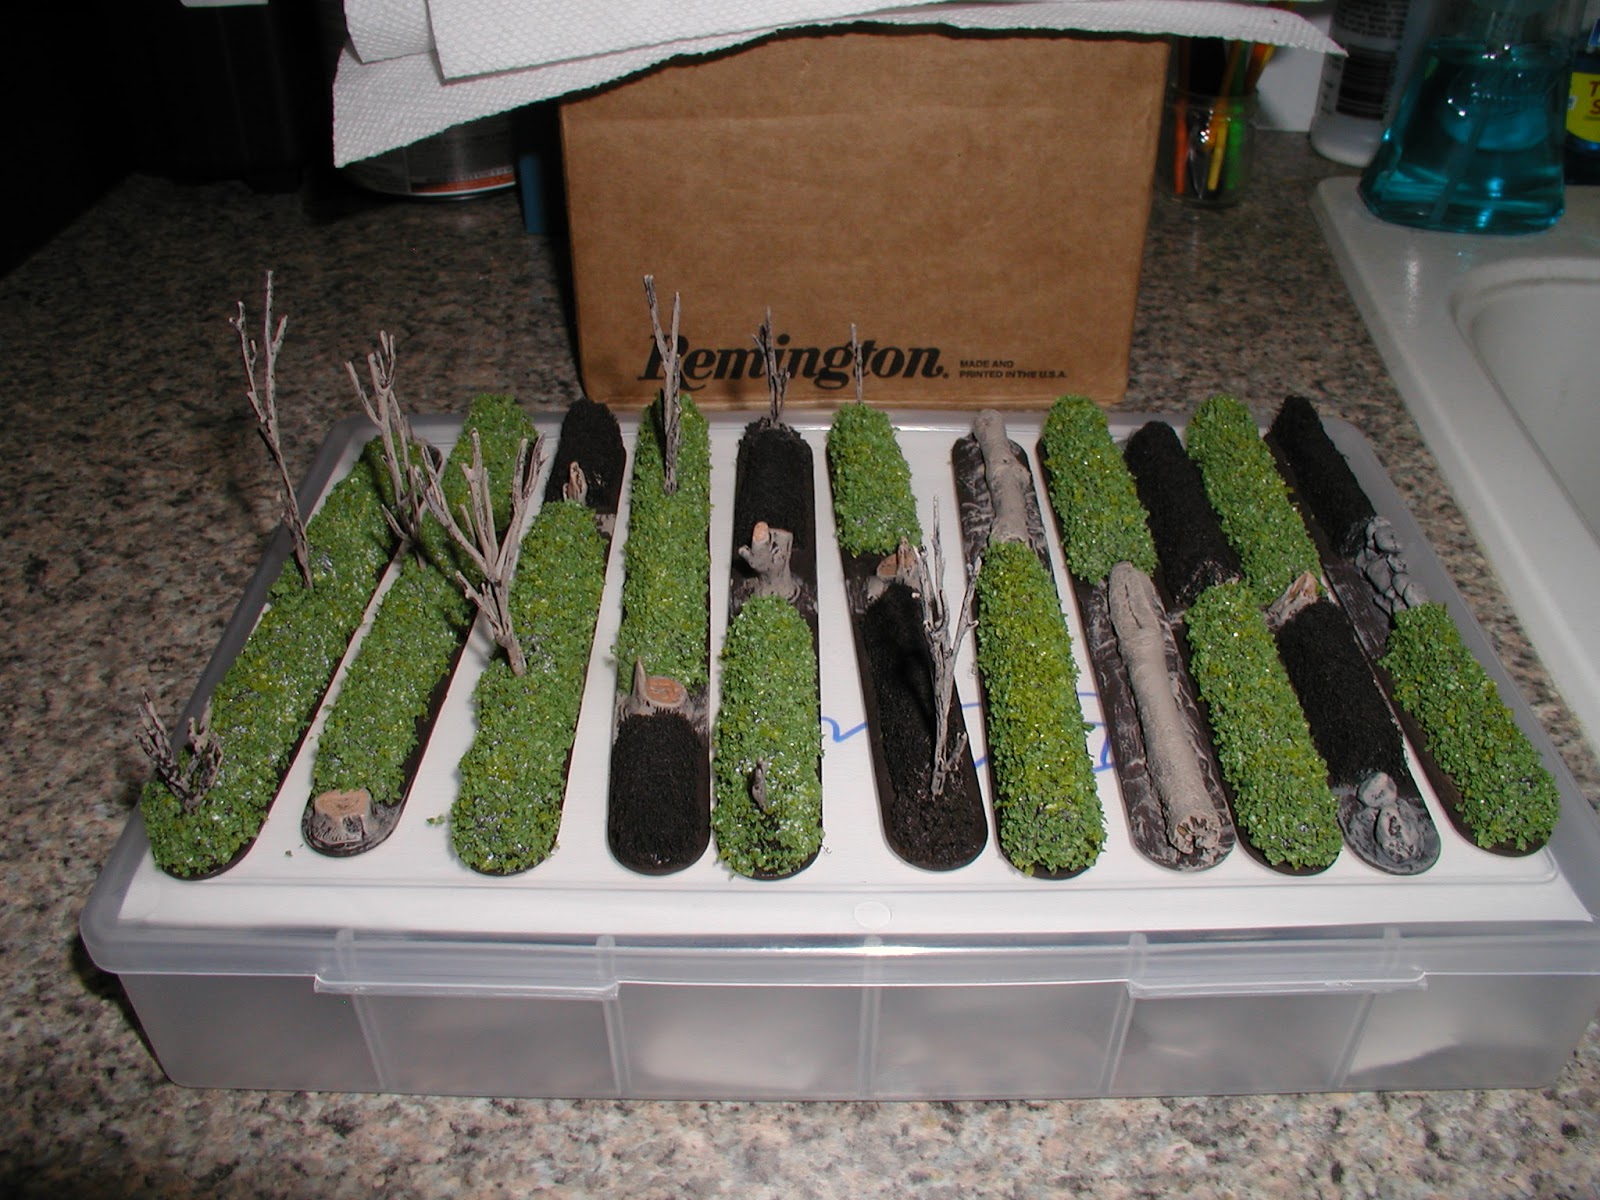 |
| Not perfectly evident here but I did the tops with a light dusting of the lighter colored Super Leaf as a highlight then put the darker over the rest. They intermingled enough at the top to subtly blend. I poured the leaf over these over a plastic container and used that overflow when I could, to ensure there was a mix of light and dark leaf randomly all over. |

 |
| Why are only half of the hedges done? So that I had something to grip while brushing on the glue on the other side. |
 |
 |
| Some finished ones. Spring tufts and what used to be the standard "Green Grass" from Games Workshop. Trying to glue down a tiny strip of grass, as I mentioned above, wasn't worth the effort. Had to be done, but I'll cover the entire lolly stick for the next batch. |
 |
| The tree foliage came in the form of the pull-apart fibrous sheets that were included in the "Hedge Row" kit. I hate this stuff - and applying it is difficult as you have to wrap it around these soft lead branches. I used regular clump foliage on the short multi-limbed bushes - like that one at the back on the right. |
 |
| All were sprayed with Scenic Cement as a final touch. |

 |
| For scale purposes, I included Magister Militum figures from their Age of Reason range. I've been using them for Napoleonic engineers to assist in throwing up earthworks- and there's some eight more with shovels and picks and others with wheel barrows. Thanks Steve for the ID. They are right at 15mm high I believe. |
You'll see these hedges again as I complete my Blue Moon ECW forces. Thanks for looking and as always, questions, comments and followers are welcome and encouraged.


