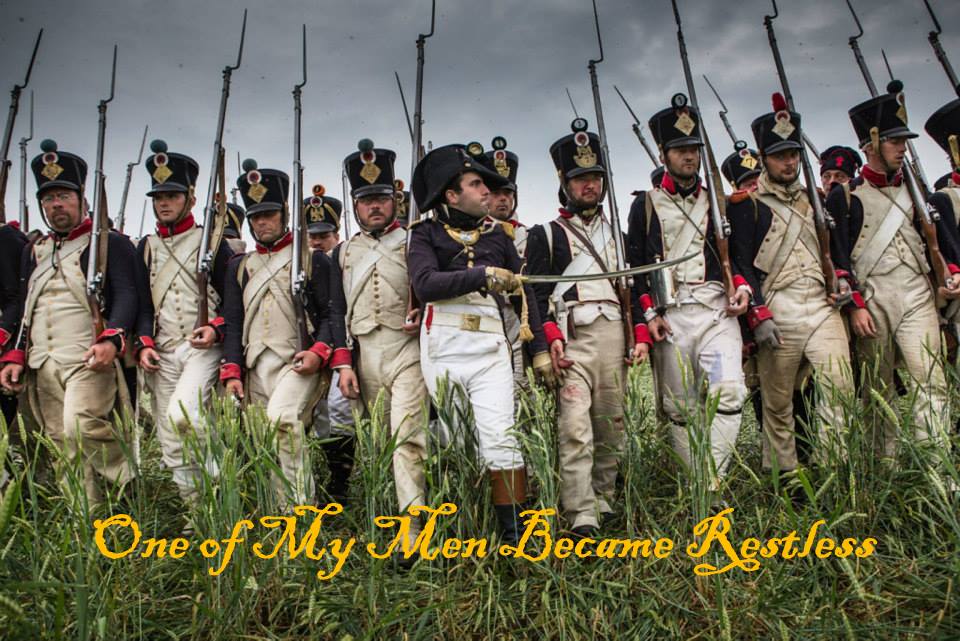
[Feb 2, 2021, Edit: Today I learned that this tune is from "Food, Glorious Food" from Oliver!]
The title of this entry should be sung to this old tune from the big cheese lobby:
I'm in a bit of a revelry having finally gotten a chance to break out the FlockBox from Warpainter (available on E-Bay). What a wonderful product! We've all been there - being very careful and frugal with our pricey Army Painter tufts, maybe putting out just one, maybe two if the figure had a that foot was in the air. Otherwise some static grass sprinkled liberally around the tuft would somehow elevate it's grandeur. For a quarter of a century that was a mainstay of my hobbying techniques. Right, "most of it stands up, dunnit" I'd say to meself. It's, of course, trampled grass, duh! Well, today I can abandon those sorry excuses, turn the page and embrace a new era of basing goodness! No more tangled fibres lying lamely at all of my models' feet.
Many thanks to Lukes Aps and the Terrain Tutor for making the whole endeavor seem quite a simple and affordable undertaking. Without them, I'd be stuck in my old methods. But as they both frequently say, "Let's crack on!"
I did have time to prepare all this well in advance picking up things here and there in preparation. I knocked up three of these holders to hover over the box itself. Materials were absurdly cheap at Home Depot - less than a couple bucks to make. The metal sheet is for joining beams together - I think they were in the pennies. Clips were also pennies a piece.
Flipped over, only the handle knob cost close to a dollar. That was affixed with the screw that came with it. In retrospect,
it's probably better to get ones with a flat knob instead of the rounded
one as it's easier to set them aside and keep them all horizontal until
the sheets can be set out to dry.
After having spent the day working these things, I wonder
if magnets would have been easier than the clips as I did lose some
real estate on the parchment paper sheets because the clips had to
cover the corners, and I had to leave room for the wire from the
FlockBox. If I had a commercial tuft making enterprise I would probably
change this up a bit. For a first go of it though, it ended up being fine.
I can recommend doing a assembly line approach for this. After learning from my mistakes, one should cut out a number of parchment paper sheets in advance so they can be slipped onto the holder with more speed and efficiency. Also make sure you have room to lay out the finished sheets for drying.
One thing I didn't calculate was how far 42 grams of static grass would last. I had two lengths, 4mm and 2mm. The 4mm was in Dark Green and Medium Green, the 2mm was Dark, Medium and Light Green - all from Woodland Scenics. I was going to do all 6 of the possible two-height combos giving me a small selection of Summery shades of deep greens. I only got as far as my first test: about 14 grams of 4mm Dark with 10 grams of the 2mm Light.
Predictably, my very first go came out slightly off. Lesson: don't make a great big goopy bead, Exhibit A - When I turned the holder upside down, the top center tuft on the sheet (at left labeled 4D 2L) began to drip down creating a wobbly stalactite of glue and grass. It fell over once I turned it upright. The others appear great!
Now rather than systematically make small, medium, and large circular tufts, then irregular shaped ones, I just did a random assortment. The center and right sheets were me figuring out how to space the glues and shapes properly. I did strips, U shapes, T shapes, and then "Micky Mice": three dots in a tight circle creating a clover shape.
I used Aileen's Tacky Glue for the bulk of these until, getting frustrated with the relatively large nozzle, I switched to Elmer's to make the smaller ones. I went back and forth, depending on what sizes I was going to make.
Another thing to note: this is a mess and once you flip the switch, grass goes everywhere in about a 6 inch radius around the box, as well as up your hand and the top of the metal holder. Once I kept scooping up that surplus and adding it back to the plate I found I could do sheet after sheet. Remember to keep the holder over the box as the second you cut the power the unaffixed grass drops immediately.
In later stages like this one above I added large pinches of a bright fairy green grass I've
had for ages (seen on the ECW Engineers figures as well as the RAFM
giant on this blog) all the while keeping that 4mm dark and 2mm light
green as the principle ingredient.
I ended up with quite a few different shades depending on how much I
salvaged and how much bright green I added in. Then I started adding in
the light brown grass in (seen on all my ACW figures on this blog) to
see how much I could lighten that original core mix. As it turns out I
never got to try any other colors as this became a full day affair of
cutting parchment paper, gluing dots, hovering the tray over and then
resetting but pick up all the scattered material and starting again.
You can see my days progression in the next set of photos. By the end I had over 30 different sheets - most of which yielded grasses most suitable for Summer, late Summer/Autumn and maybe even winter. I'll be able to mix and match as needed. The smallest sheet had 30ish tufts while some of the others with the smaller tufts all have well over a hundred on them each.
Would have been happy to have been done here but so much grass remained. I did keep folding in more and more of the straw color to further lighten it up.
10 sheets later, running out of room ...
Finally, some of the tan ones on their own and I finish for the afternoon. And yet STILL I have enough of the original core mix to do several more sheets after sweeping all the stray material up.
These in particular is what I see here in Virginia along the roadways and other untended lots. All variations and shades of olive: perfect!
These came out pretty good. I made the horse shoe ones to wrap around feet - we'll see how useful those end up being.
I could easily do a few hundred more sheets with the remaining greens but pretty sure I'll never have to make more of most of these Autumn/Winter colors again. Of course, from here on out you'll be seeing all of these again as they are liberally applied to models going forward.
New! I did another pair of afternoons trying out other combos: The original batch was 4mm Dark Green paired with a lesser amount of 2mm Light Green (4D2L). To that I added a bunch of straw/winter grass to lighten until it was just that deadened mix on its own as you can see above.
This was 4mm Dark green again with 2mm Medium Green 4D2M). As it started to thin, I added in the candied lime green in I mentioned earlier to fill it out. It'd be near impossible to trace as I kept adding in that which blew all over into each and every pass so they are all a jumble.
This afternoon I did 4mm Dark Green with 2mm Dark Green (4D2D) for an exercise in texture variety instead of color. These are still wet so they look a bit lighter than they will later. I really wanted a nice dark summer grass and I think these hit the mark.
Here's the original 4D2L from last week
Here's the 4D2M from earlier in the week
These 4D2D favorites are still wet so they might look a bit off here.
That's sixty three sheets of tufts in all the likely shades I'll need for perhaps a lifetime. Thanks for looking - questions, comments and followers are welcome and encouraged!
Only a handful of figures remain that will be predominantly in Citadel Contrast paints. It's been a fun experiment and, as I've stated elsewhere, has really improved my output for the year. The experiment may not yet be over though as I am torn between doing all the many gravestones I've been collecting or some 15mm buildings for the ECW. Not quite sure just yet. The remainder of the year however, will feature much more traditional entries.
Meanwhile, Things that go Bump in the Night is a one-pager set of rules designed for gaming the standards of the classic horror genre: werewolves, vampires, mummies, zombies, etc. Box 1 included these four miniatures, as well as four protagonists to oppose them. The latter, like the "Wolf Skins" in the West Wind - Empire of the Dead set will need to be painted up in the traditional way being standard adventurer type figures.
This one is Citadel Contrast Cygor Brown over Wraithbone primer. It is also the first appearance of Cygor Brown here. I was reluctant to get this color as I noticed it was very dark in all the preview shots online, but I always can use a dark brown for this and that so thought I'd give it a shot anyway. As as a one shot and done application (like so many of the other Contrast paints provide) I hated it immediately- way too dark. To fix, I went back in with a drybrushed highlight with Wriathbone to bring back some contrasts. Came out pretty good I think if not still a little flat.
For the next one, I wanted to try mixing that dark Cygor Brown with Liquitex Matte Medium to see how that would come out if I reduced the ratio of pigment to medium. It's good, but I think I actually prefer Wyldwood for this kind of fur instead of this rather ruddy result. Like the other wolf see above, I went back in and drybrushed with Wraithbone to bring back some highlights.
Speaking of highlights - the Woodland Scenics clump foliage looks really flat here and could use some tonal variation.
This one is, like most of the other four legged wolves, simply Contrast Templar Black - no additional highlighting. Eyes, mouth, base, done.
The sculpt on the teeth of this guy though is a mess: looked like maybe gore, maybe slobber? In any event, the teeth were long and undefined. Let's try the gory route, says I. My first pass was terrifically bloody - so much so that I had to tone it down a lot for the final.
Oof that clump foliage is bugging me with it's evenness.
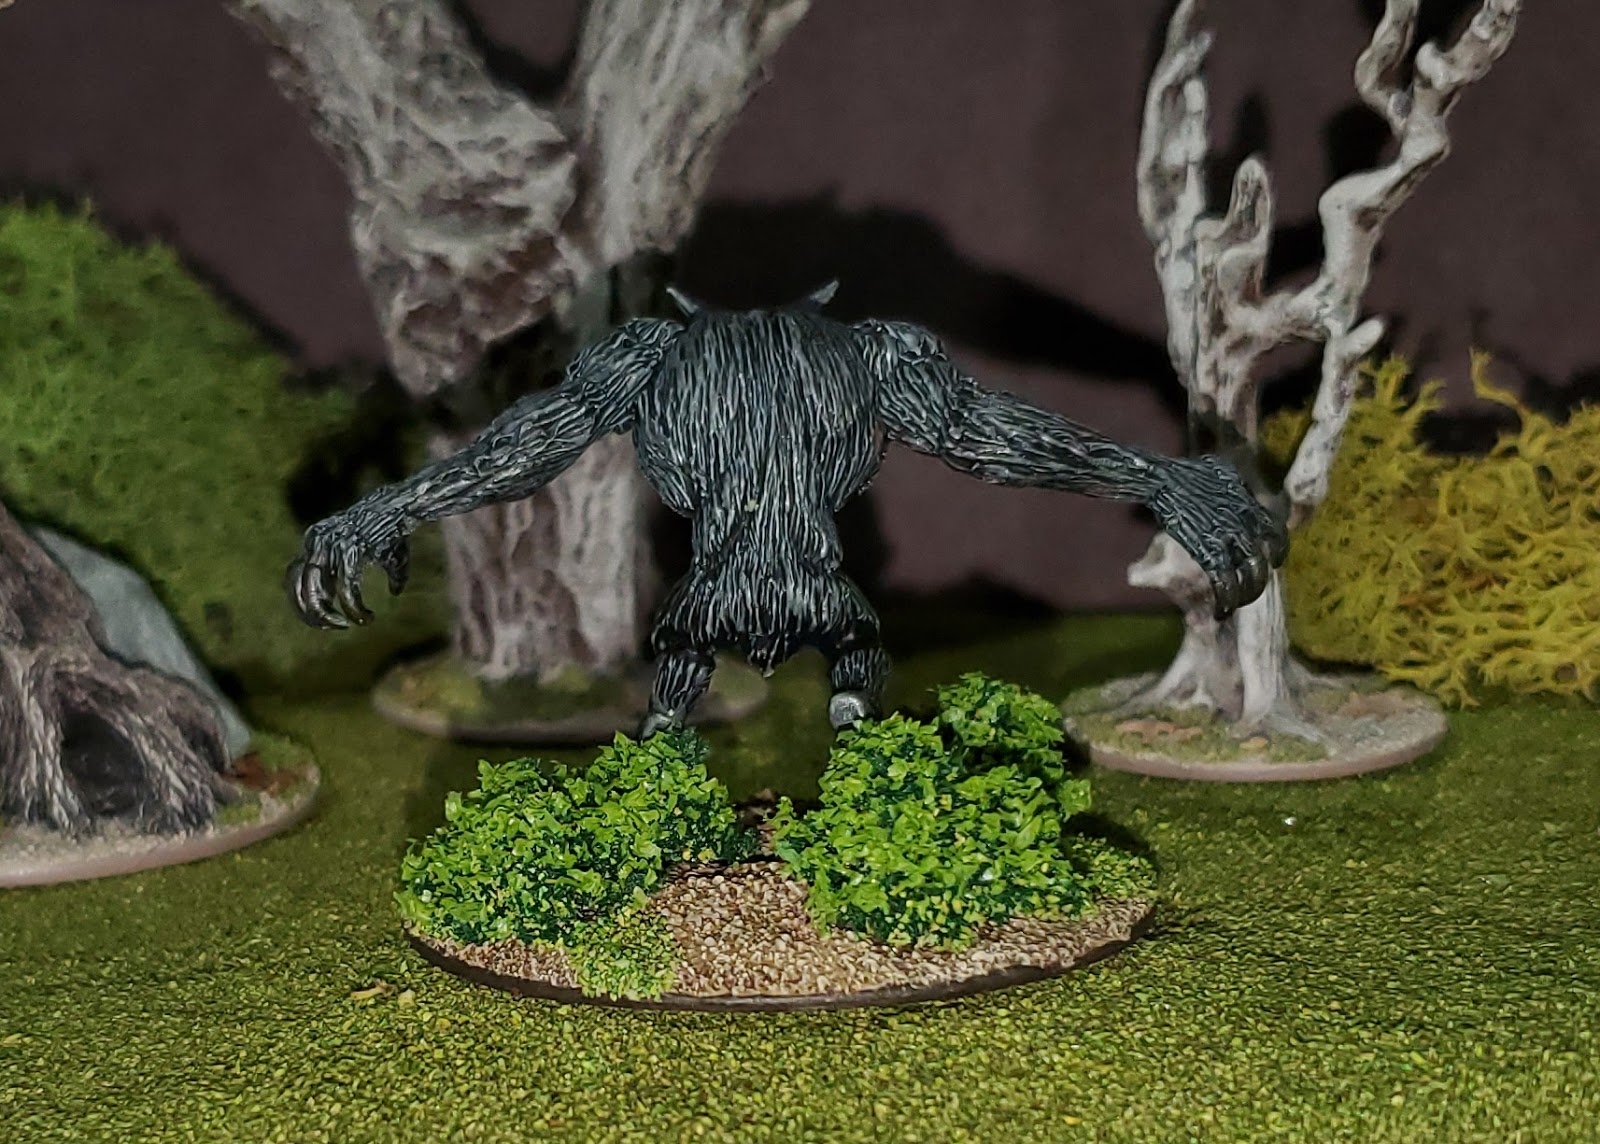
Easily the biggest werewolf I own, this one rolls the d20 and has to be the leader of all the lycanthropes in my collection. This head was the wildest of the three provided and is a little too straight ahead. But that provided the most secure fit, though I do think I'd have liked to see it as a crazy angle like seen on the box.
For bushes of this size I used the Dark Green clump foliage from Woodland Scenics and glued the light green Super Leaf over the top to give it a highlighted appearance. It worked out OK, I didn't think about breaking up some small trees to decorate the large empty base until it was too late. You know, as if he had just burst into a clearing.
For most minis, I don't care for the Blue Moon style of a finished and framed integral base, so On all of these I put on washers, built up the sides and slopes with some modeling paste then added model railroad ballast over the lot to being it together. It takes some doing, but it also adds a lot of real estate that needs landscaping.
A potential action shot featuring two West Wind figs! The four antagonists that came in the box, which will be Part 2 of this entry, are in line but not next.
I have a number of other things nearing completion to look forward to for Halloween (hopefully), so until then, thanks all for looking - questions, comments, followers are welcome and encouraged!
Believe it or not, I'm running out of miniatures requiring Citadel Contrast paints! Perfectly fine though with that - I did, or will soon complete, just under a hundred minis this year that would have lingered to some date far in the future.
I did West Wind's Empire of the Dead Kickstarter a few years ago and got a lot of great minis out of it. This pack is the Beast Lord and his furry retinue. (Not yet pictured are the four "Wolf Skins" or human henchmen type allies. Those will have to be painted in the usual way, being devoid of fur of any kind.)
These two bipedal ones (is this one the Beast Lord?) were done with Contrast Wyldwood over Wraithbone primer- I did go back over and dry-brush the Wraithbone back in then did the eyes and mouth and base details to finish.
Contrast Wyldwood over Wraithbone primer, the pants in Contrast Templar Black, with the vest in Contrast Basilicanum Gray. This whole model was again dry brushed with Wraitbone again. I did try a mix of Templar Black and Wraithbone to try and get a middle tone between the two but it looked like heck. I didn't use much of it other than to feather in some more highlights where the heavier black tones were in areas that should have seen more light.
Not thrilled with the green ink I put over the sculpted grass here - I don't think that will last the week.
I have enough of the black wolves from other
manufacturers and thought theses needed a more traditional appearance.
These are simply Contrast Basilicanum Gray over Wraithbone followed by a
second coat of Basilicanum Gray over the tops again to give it the extra darkness there. I don't think I dry brushed these after.
No flash here or on the next
Those "Wolf Skins" henchmen I mentioned will comprise the Part 2 of this entry. They are in line but not next.
Thanks all for looking - questions, comments, followers are welcome and encouraged!
I'm probably not thinking this through by doing all the
specialty units and accessories before I do the main army regiments but I
like to set the scene completely before I bring war and destruction to it.
Messing around with the flash
Trying to paint the illusion of dug holes without adding any additional height to the mini and not sure how well I succeeded here.They are based on washers do no digging through that.
Just trying to think of all the ECW rules I've read were there is a need for engineers and pioneers at all. These may end up being never used for anything but decoration.
It'd have been difficult to paint these as exclusively Royalist or Parliamentarian so they can be set up on either side.
I've had a Royalist regiment approaching completion, but Hey Squirrel keeps getting me.
Thanks all for looking - questions, comments, followers are welcome and encouraged!