Sunday, January 22, 2023

25/28mm Old Glory - 1812 French Voltigeur Company Command Elements

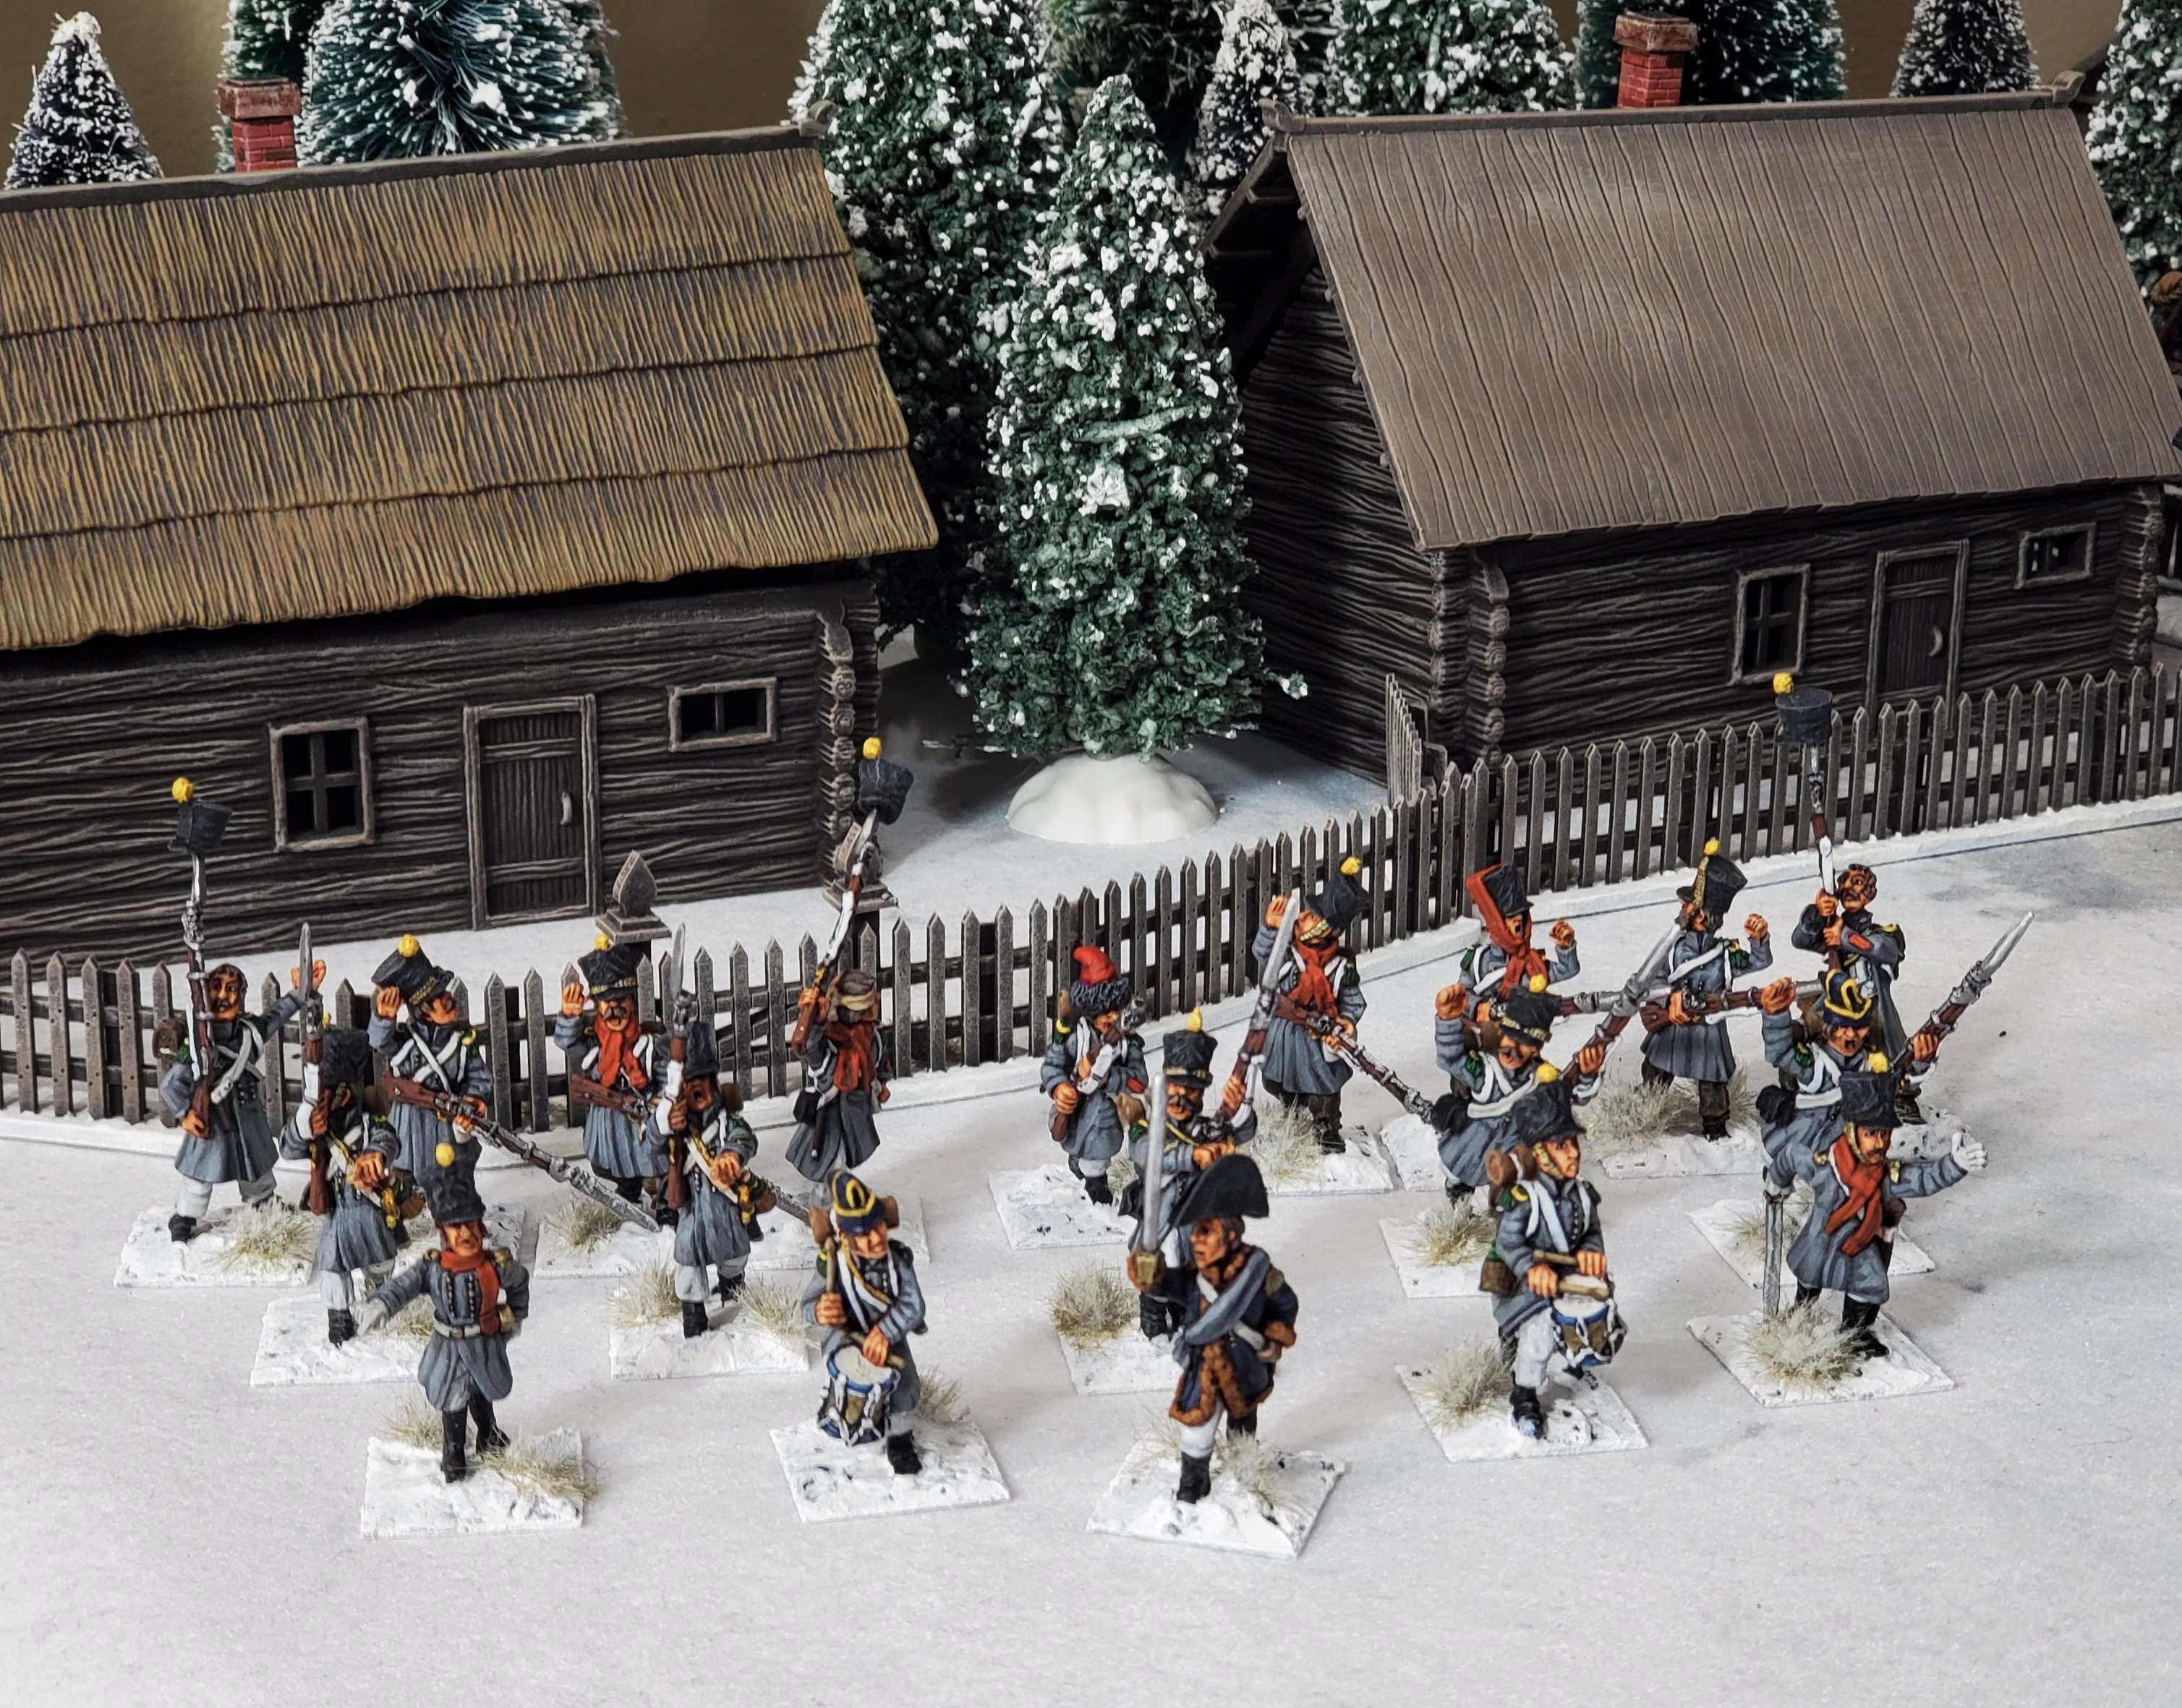
Big progress on this 1812 campaign game I'm building. It starts with an improbably full strength voltigeur company ~120 figures and begins in October after the first snowfall after Maloyaroslavets. What's left of the parent regiment is the 4th company as well as the regimental HQ which can be seen here and here. In the line, the 4th would be adjacent to them. The rest of the regiment is considered destroyed or was split off into another formation - perhaps the main one. With the voltigeurs and the 4th are a battery of guns - seen here.

By now Napoleon's Grand Armee is already under half strength and the campaign will center on the adventures of this company as it makes it way back to the Polish border. I've been collecting all the 1812 figures I can find and they will turn up as units intermingle and or replenish themselves. 

Contrast paints will make doing the 90ish privates much easier than I had planned but for now I wanted to paint up, in my usual fashion, the company command elements.

  • 1 Captain
  • 2 Lieutenants
  • 1 Sgt Major
  • 4 Sergeants
  • 8 Corporals
  • 1 Fourier (Quarter Master)
  • 2 Drummers

These have been "in progress" for years - I'm very slow and flit about as regular readers understand. In the top pic they are divided evenly into the two sections with the Captain, the Sgt Major and the Fourier dividing them. Let's start with them: 

These would be "Big Men" in Sharpe Practice but obviously they could be whatever is needed for all of the various skirmish games out there. They may even turn up in Silver Bayonet.

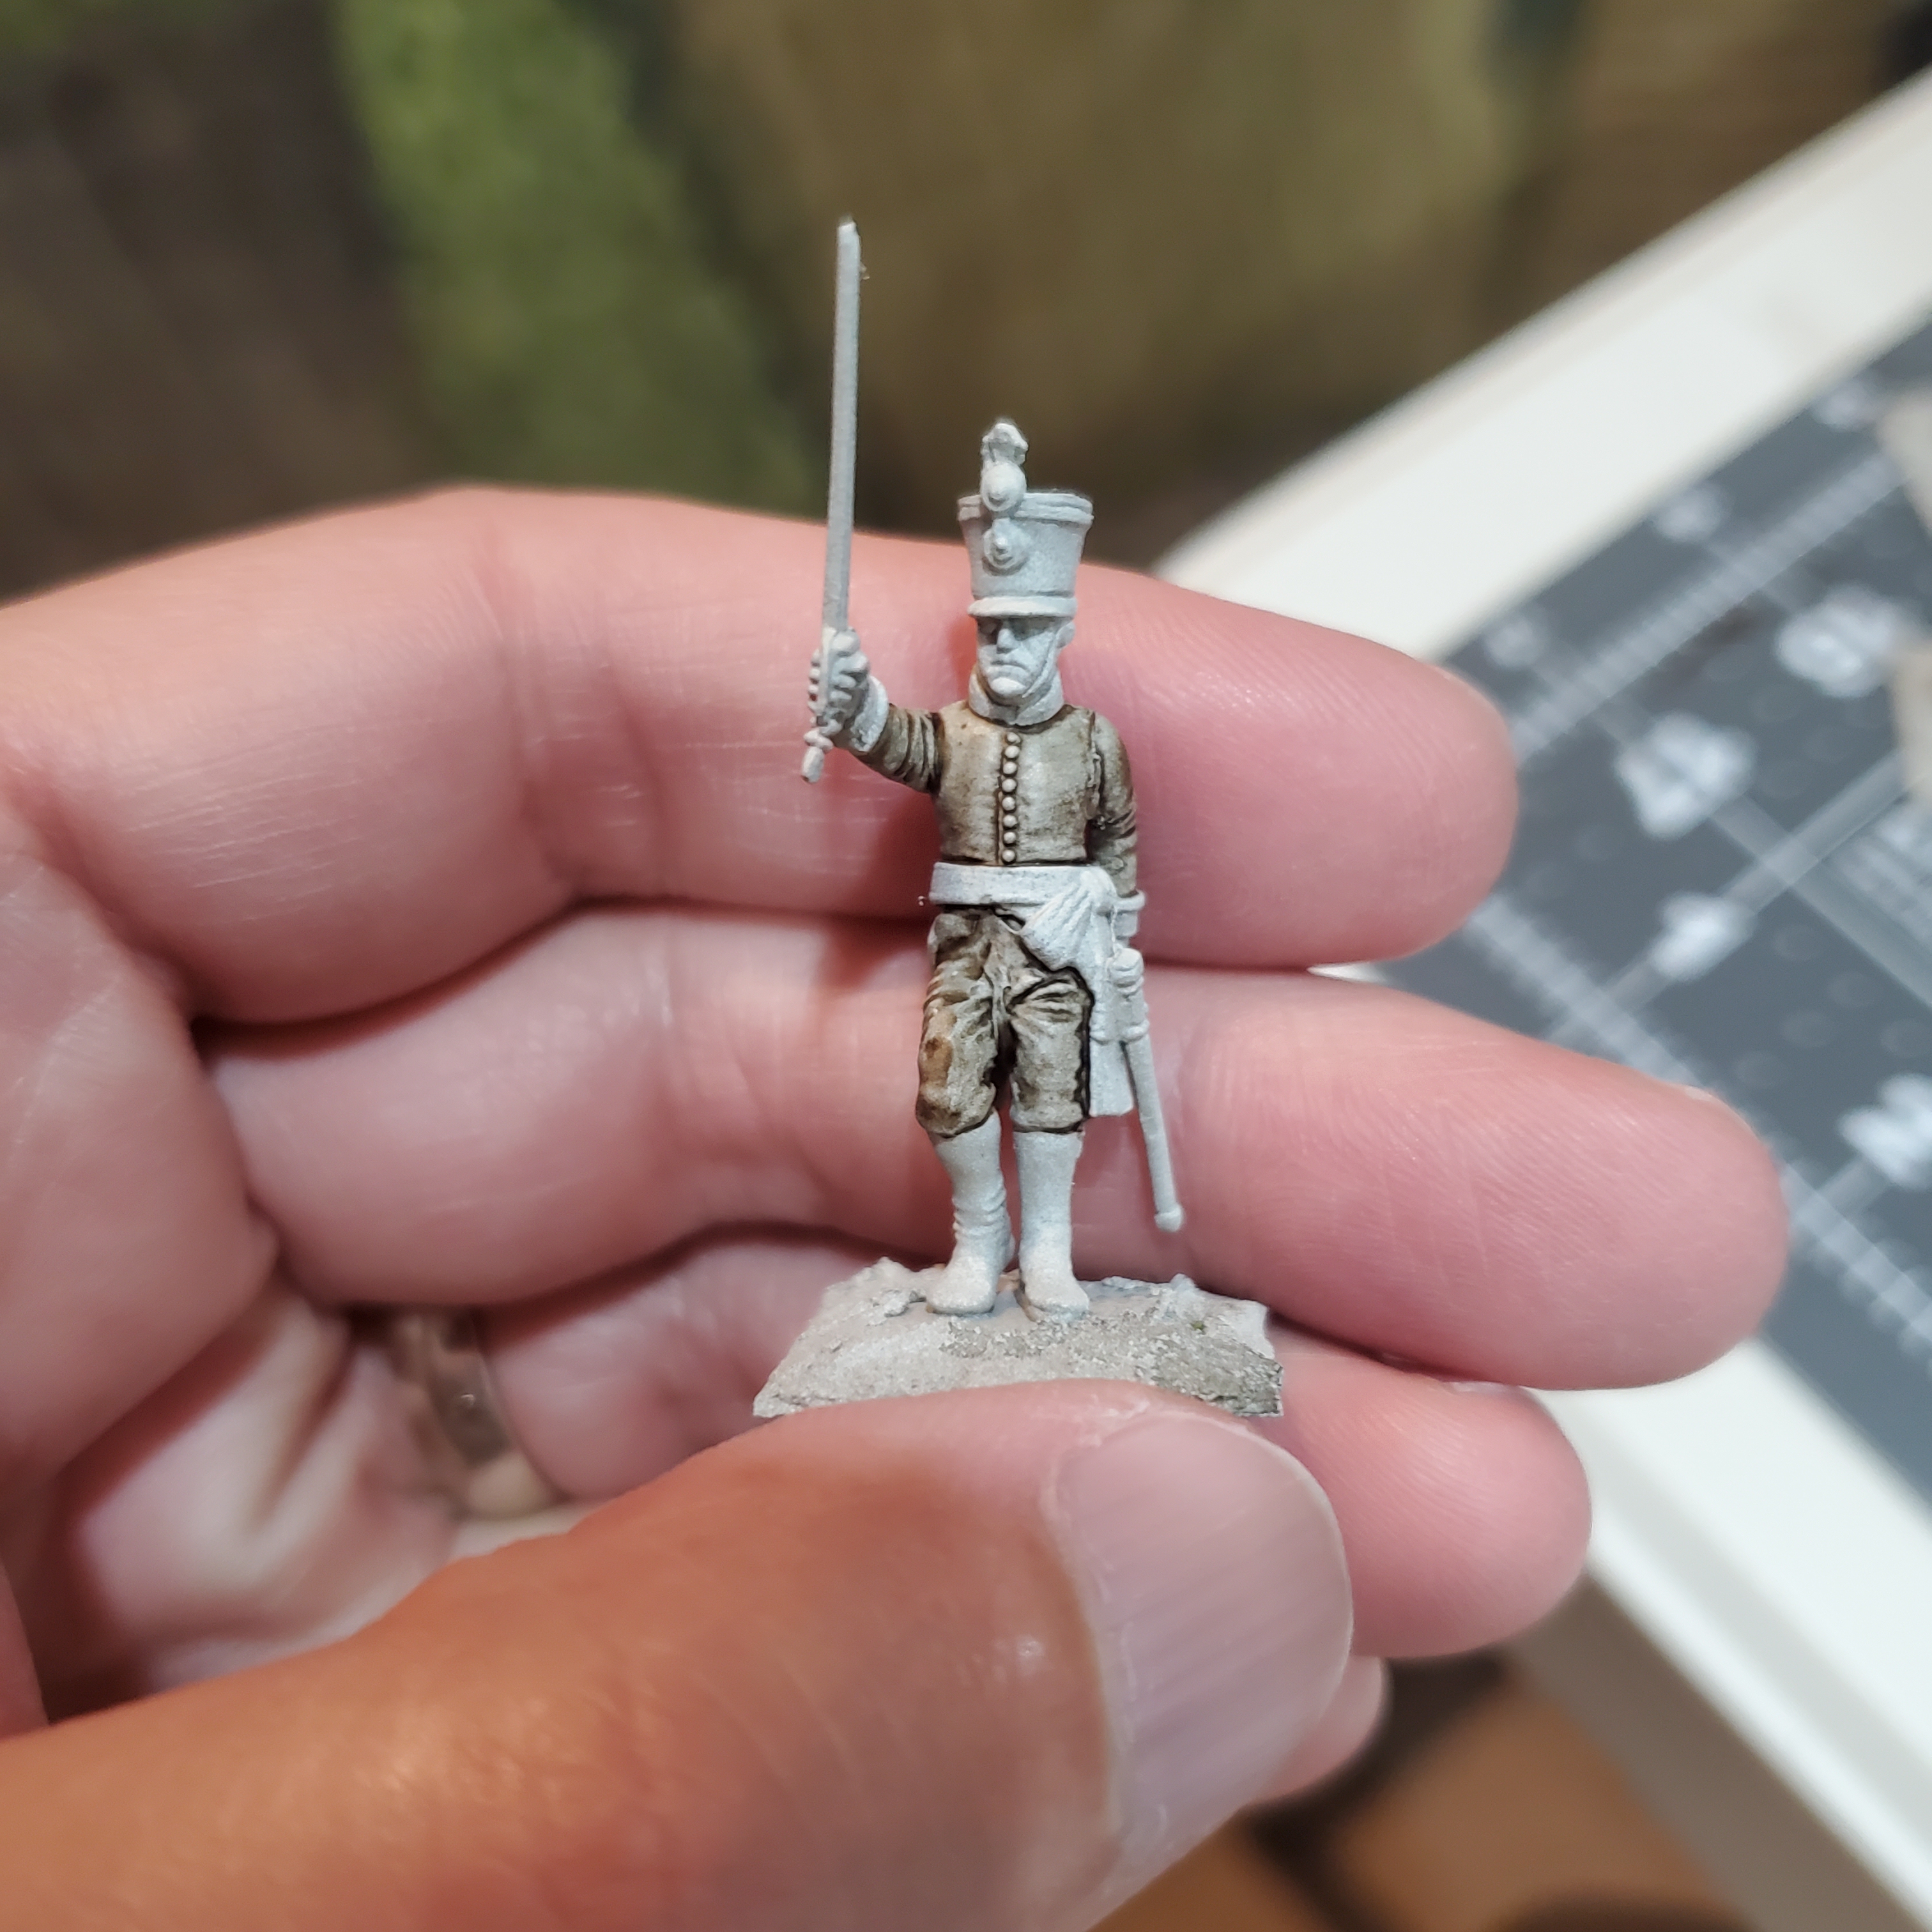
Fourier in the pilfered red cap. I imagine he'd provide bonuses to securing food, ammo, and supplies while he's alive.

Here's the corporals for one of the sections. I made a point of painting on those designations on their coats - same with all of the NCOs.


The Sergeants for one of the sections - more Big Men

Sergeants joined by the section Lt. and drummer. I looked for cornetists for ages and finally got some from Calpe but then read even the voltigeurs used drums as the horns were less audible in combat.


Section two corporals - most of these NCOs are from the "Energetic Infantry" bag. Most didn't come with epaulets which I had to add myself. When I cooked up this project there were no themed Retreat figures (Perry, North Star) so I did the scarves myself in green stuff. Imperfect execution on the 'sculpting" but they came out alright.


Second section Sergeants

Second Section Sgts., Lt., and drummer


Just the company drums

The company Lieutenants - I'd like to have cards made up with their portraits for Sharp Practice.

I imagine he'll be called "Renard" because of the fox fur edging on his coat - also green stuffed.


Just the company Sergeants

The company Sergeants with the Sergeant Major

All the company Corporals - the themed scarves came from the same shop in a Moscow suburb

Insight into the green stuff process:


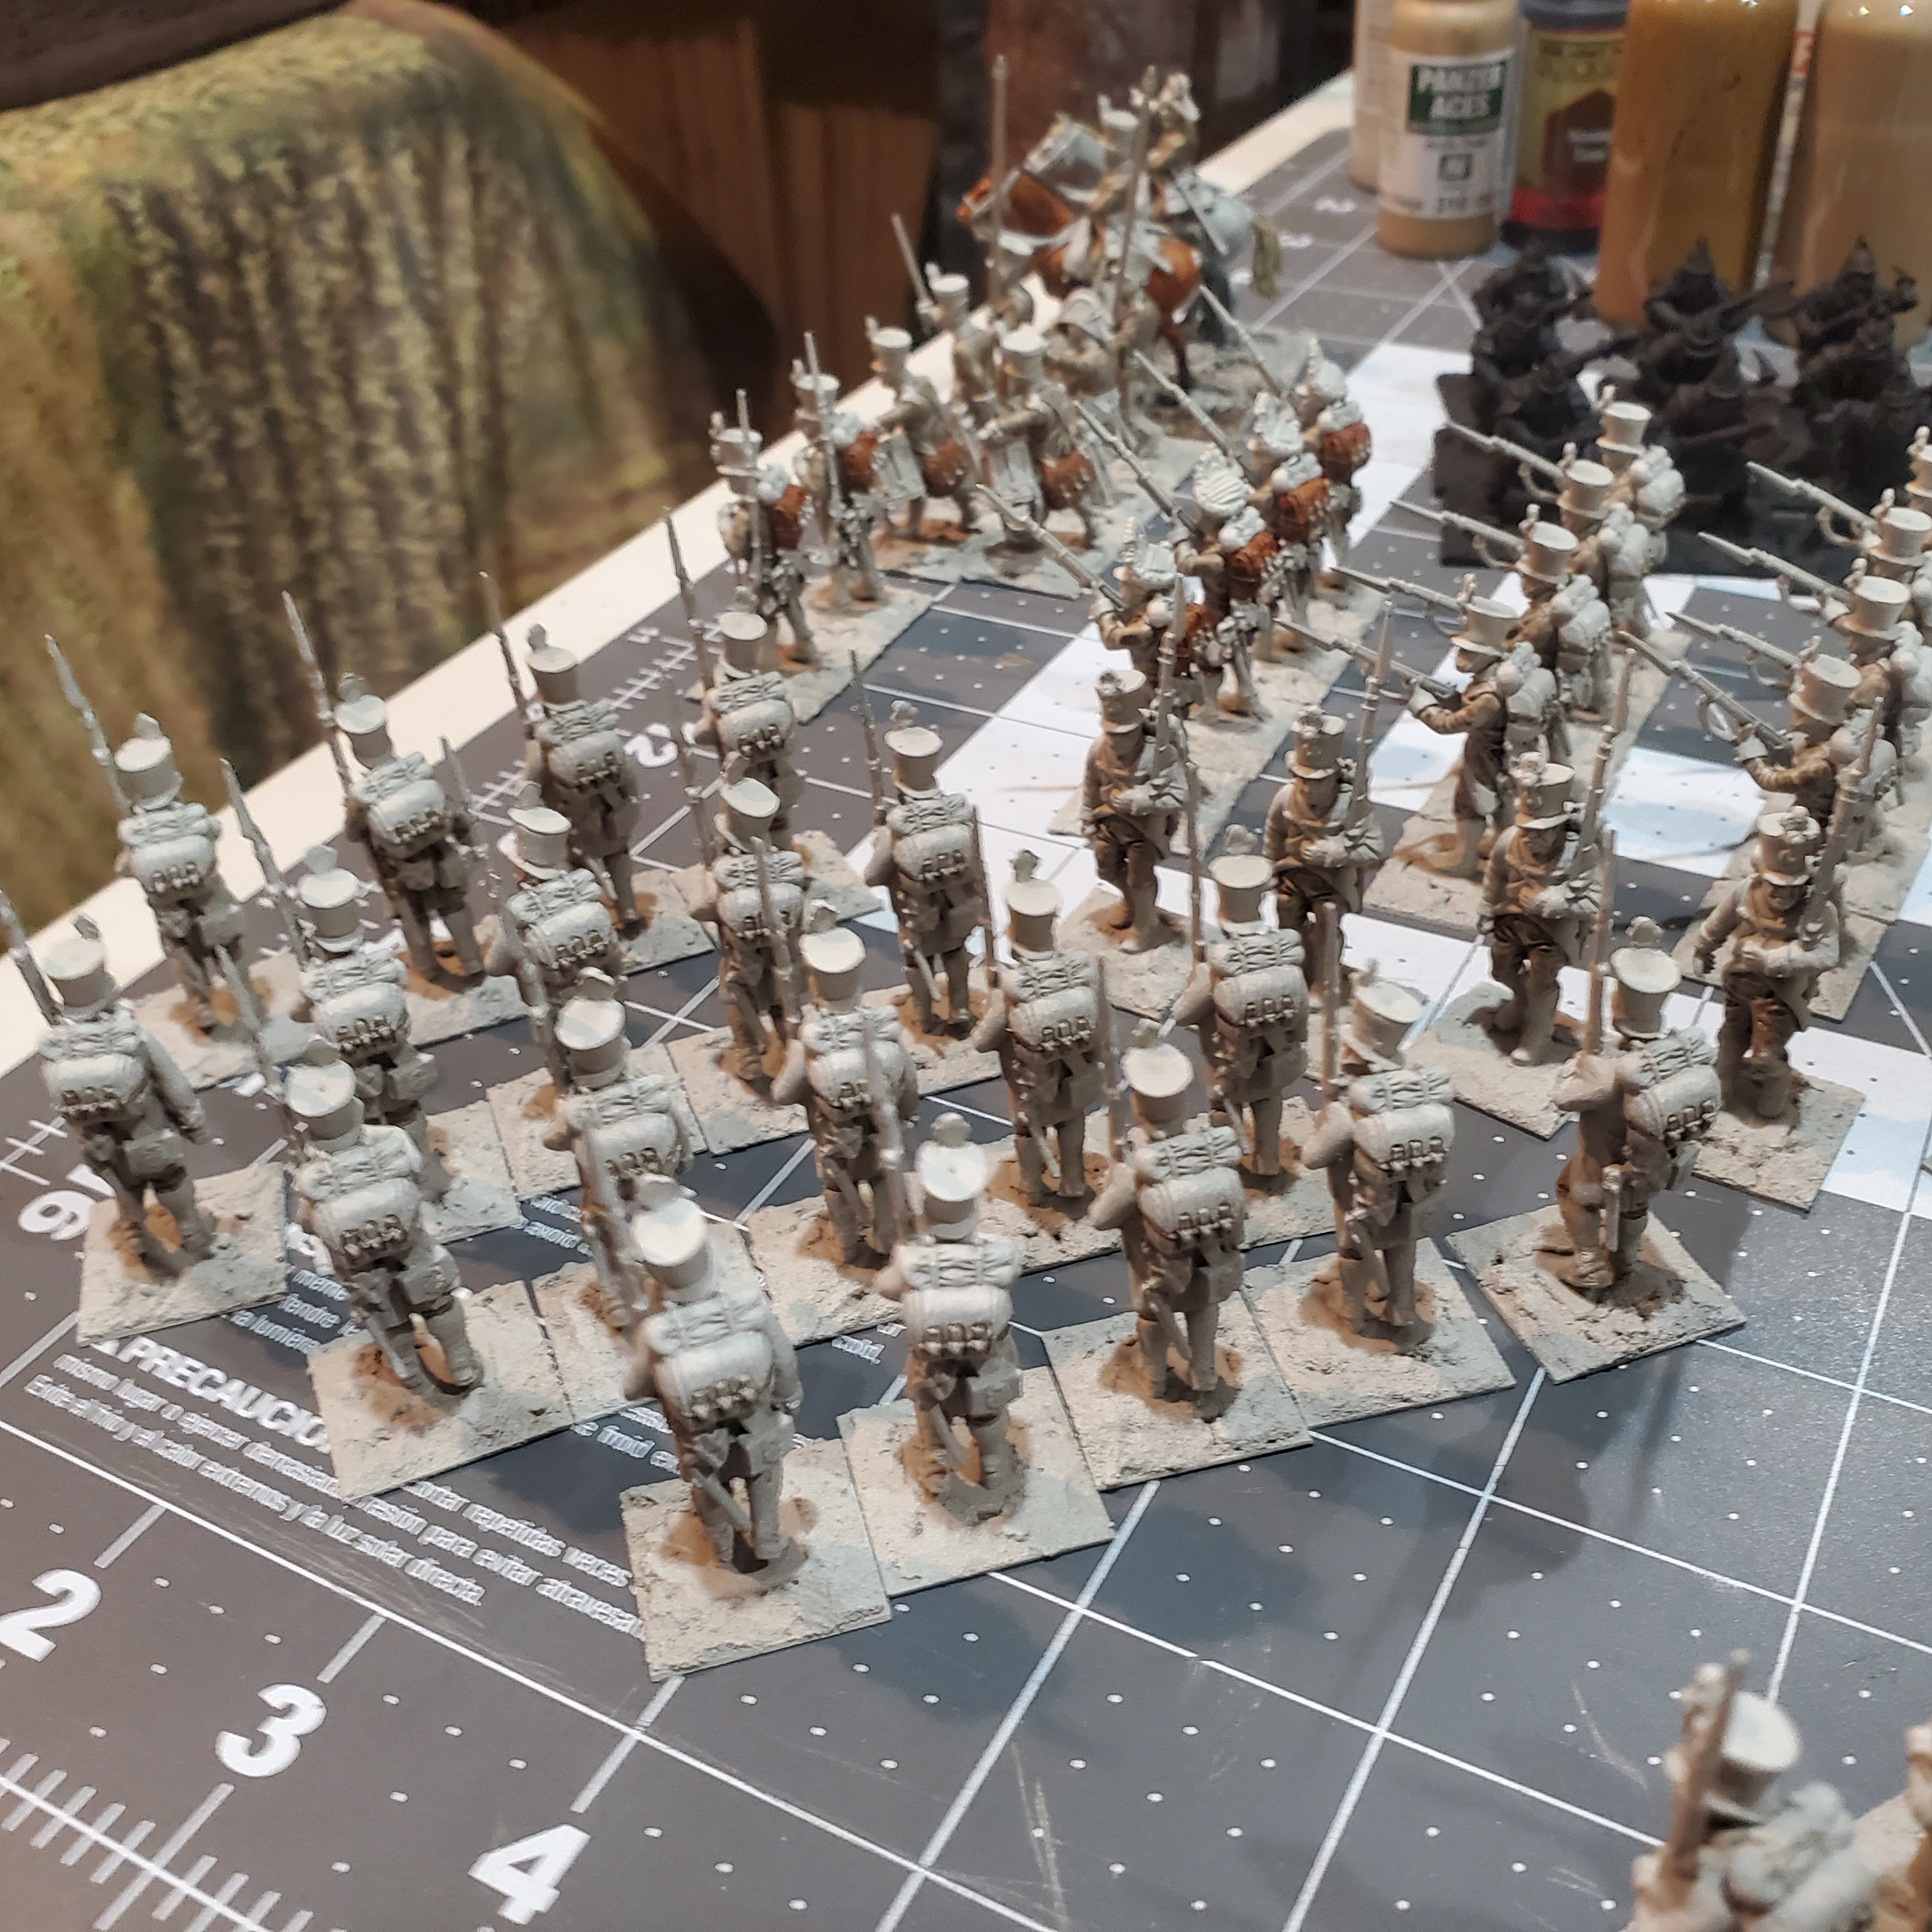
Finally, I was glad to find at Hobby Lobby a sub-range of textured paints from FolkArt called Terra Cotta. Above in the green stuff pics is modeling paste with dries hard and white. It all gets primed, then painted brown before I put on "the snow."

My first attempt at snow is retold in the dancing Cossacks post here. What a process that was. In any event it is a much shortened one with what FolkArt is calling "Snowbank/" It fits in with the rest of the pieces I've already done and strips several steps out of the process. One thick coat and it's opaque enough to cover a very dark brown earth color I had laid out on the bases. It was slightly blue on the miniatures but on the pallet it dried warmer. Looks great to me and saves a ton of time and money - only $2.99 for four times what GW sells their snow 'solution" for.

After this dried I added "Tundra" tufts from Army Painter to finish

So you get a sense of what the core of the force will look like - that's the command pieces seen above along with with two sections. From Old Glory its a single bag of one elite companies firing, one advancing, and one defending - all in greatcoats. No scarves on these.

More Cossacks coming up next!

As always, thanks for looking - questions, comments and followers are welcome and encouraged! I'm doing more and more on Facebook so follow my page there too! https://www.facebook.com/One-of-My-Men-Became-Restless-100659928063858

Friday, January 13, 2023

28mm Victrix Napoleonic Austrians

 As a famously slow painter I thought I could use washes and contrast style painting techniques to do one of the most hated tasks in wargaming: painting Napoleonic Austrians. To date I've been sticking to 1812 Russian campaign and the Peninsula so never had to worry about taking on Austrians in any quantity. But, the Silver Bayonet rules inspired me to provide some backing soldiers to the cool miniatures from North Star. I could have gone with Foundry, or even Perry but I was able to get Victrix models locally. I also don't want anything to go to waste so figured I'd just do the box and never do Austrians again. (I bought a box of Perry Musketeers for Prussians to back their Silver Bayonet characters too but that's a tale for another day.) 

In any event here is the result:


My first instinct was to do the whole box as one regiment. But Austrian regiments didn't carry two colors meaning I'd have an extra flag dude. In the event I wanted to use them for Sharpe Practice or Black Powder, or some other skirmish game, it made more sense to split them up.


I had leeway on facings then - to distinguish this unit from the orange one below I chose purple here, marking this unit as No. 50 Stain. As far as I can tell the two were never brigaded together. If they were French, British or Russians I'd have paid closer attention. These are a one off exercise I'll never revisit so it is what it is.

The flags in the box didn't denote any particular regiment except this one flag for the No. 59 Jordis regiment. One less decision to make concerning facing colors - orange it is!


What follows is the step by step. This was a year long project from assembly to completion. I tend to flit from one thing to another as my interests direct me as followers of this blog will know. I enjoy assembling plastic models - tons of fun! Last January, I split the models into two identical units then put it all away for six months.


In July I got serious. I think this is Citadel Wraithbone spray as the undercoat then did a white? over the top as a zenithal. I should be able to do a quick stain and be done with the uniforms right?

Let's start in on the command. So far so good.


How about some Contrast Gore Grunta Fur for the horse? Lovely. Contrast Black Templar for the mane and tail.

Then suddenly - a five month break. In November I take a more dedicated approach.

Black stockings

For final highlight, I'll drybrush an off-white over the Strong Tome and done! Let's test.

Looks great - on to the rank and file.

Shade them buckles! I did rifle straps too here iirc.


Packs - more Gore Grunta Fur. Rolled overcoats: Basilicanum Gray. Miracle products: speed paints.

Boots and shakos - Black Templar again


Shako details


Hot Tip: I wanted to protect the yellow shako badges from the Black Templar. A mis-stroke and I will have to redo it as the black will cover the yellow VERY easily. With ordinary black paint I put in some black borders between the yellow and the rest of the shako - then I wouldn't have to be so precise with the contrast. Unseen here is I also did the underpart of the visor so black wouldn't get onto the face, which needs to remain very pale for the Contrast to work.

Skin and hair

The yellow bits - Contrast Iyanden Yellow. This is a good shot of what was pretty close to the finished un-dyed linen cloth for the uniforms I had envisioned. My intention here was to just hit some of those top edges with a brighter white. This plan gets derailed badly but still comes out in the end. Into December:

Muskets and other details


I organize and paint by pose so I know exactly what is where. Henry Ford would be proud.

I saved the facings colors for late into the process.


I dreaded this part but it came out fine.


At some point I realized the Contrast wasn't looking great on the facing colors so I mixed up some lighter purple and highlighted them back up.


Contrast paints alone weren't cutting it for a white horse so I relied on more traditional highlighting here.

What do I call these  - these are all figures whose pose is numbered to 4 or less. During some session I went in to highlight the cloth and grabbed the wrong color from my wet pallet and did the 20-odd figures here in a color far too light. This is Vallejo Game Color Off-white. By the time I realized my error it was too late to redo all these. Thus I chose to basically do ALL of them in the VGC Off-white - covering up most of my un-dyed linen thing I had going. Now they look far more like Austrians that everybody sees. Plus this took a lot longer to do since the highlight was too bright for the Strong Tone to blend well so I covered up mush of the subtlety I had already established with the darker colors. 2022 gave way to 2023.


Was really hoping for an olive green but on two occasions bought "Sap Green" which, by the label, appeared to be closer to olive. This is not what I had intended but turns out it didn't matter much as the basing material covered it all very solidly.

Geek Gaming has a US distributor now putting this innovative in easy reach. I was curious about this - a one step basing solution with a mix of corks, flocks, grasses, foams

It's an interesting thing the light stuff floats to the top, and underneath this green layer is a heavy dark brown. The under layer is really dense and dipping a figure in is tough as it has a wet sand feel to it. it has a weight to it too - hard to describe.


You can see where the dark under layer part is dominating some of the corners especially. In the end I don't love it. I think I will sift off the cork bits - the brown "stones" kinda float on the grass. I thinned out some of the piles of it but enough got left behind that looks like no terrain I can recall seeing in nature. I'm fine with everything else though.

Flags glued - I did go in and fix the edges.

Fun project - didn't go quite as quickly as I had intended but they came out fine in the end. I intend to do the Silver Bayonet Austrians to go along with these somewhere close to next. As always, thanks for looking - questions, comments and followers are welcome and encouraged! I'm doing more and more on Facebook so follow my page there too! https://www.facebook.com/One-of-My-Men-Became-Restless-100659928063858