Sunday, September 14, 2014

Bonehead Walmart Winter Tree Tutorial

          Every year, Walmart sells bargain trees ranging from $1-3 dollars in various sizes, intended for miniature holiday displays. They are so ubiquitous that I often take them for granted and decline buying any - this may be a mistake. Some are white and frosted - they are a tad too unnatural for my tastes. But the others are quite serviceable as is; their bases are big, robust and slightly weighted to prevent toppling. But for ease of set-up and to prevent excessive wear and tear, I like to base large portions of them. I cleared out one Walmart of its useable trees a few years ago to make this simple Winter Forest.


What follows is a 101 tutorial for their assembly:

Difficulty: Very Easy
Cost: $-Cheap
Tools: Pictured below is most everything you will need, except for the Rustoleum Textured White spray and an old paint brush.

I may be taking this for granted - that old cd's can still be acquired in any quantity. Who was arguing against pack-ratery again?

Everything pictured is cheap, and can be found in any big box craft store. The trowel came in a set of 6 of various shapes and sizes. Walmart may have much of this stuff.


First Steps: with the masking tape I covered the center hole of the CD, then in a triangular pattern, I masked out the spots where the trees themselves will be glued down. I prefer a bond between the CD itself and the tree so that's they are not merely attached to a layer of paint.

Then I sprayed it all with the Rustoleum Textured white. When that dried I took off the masks to expose the CD surface.

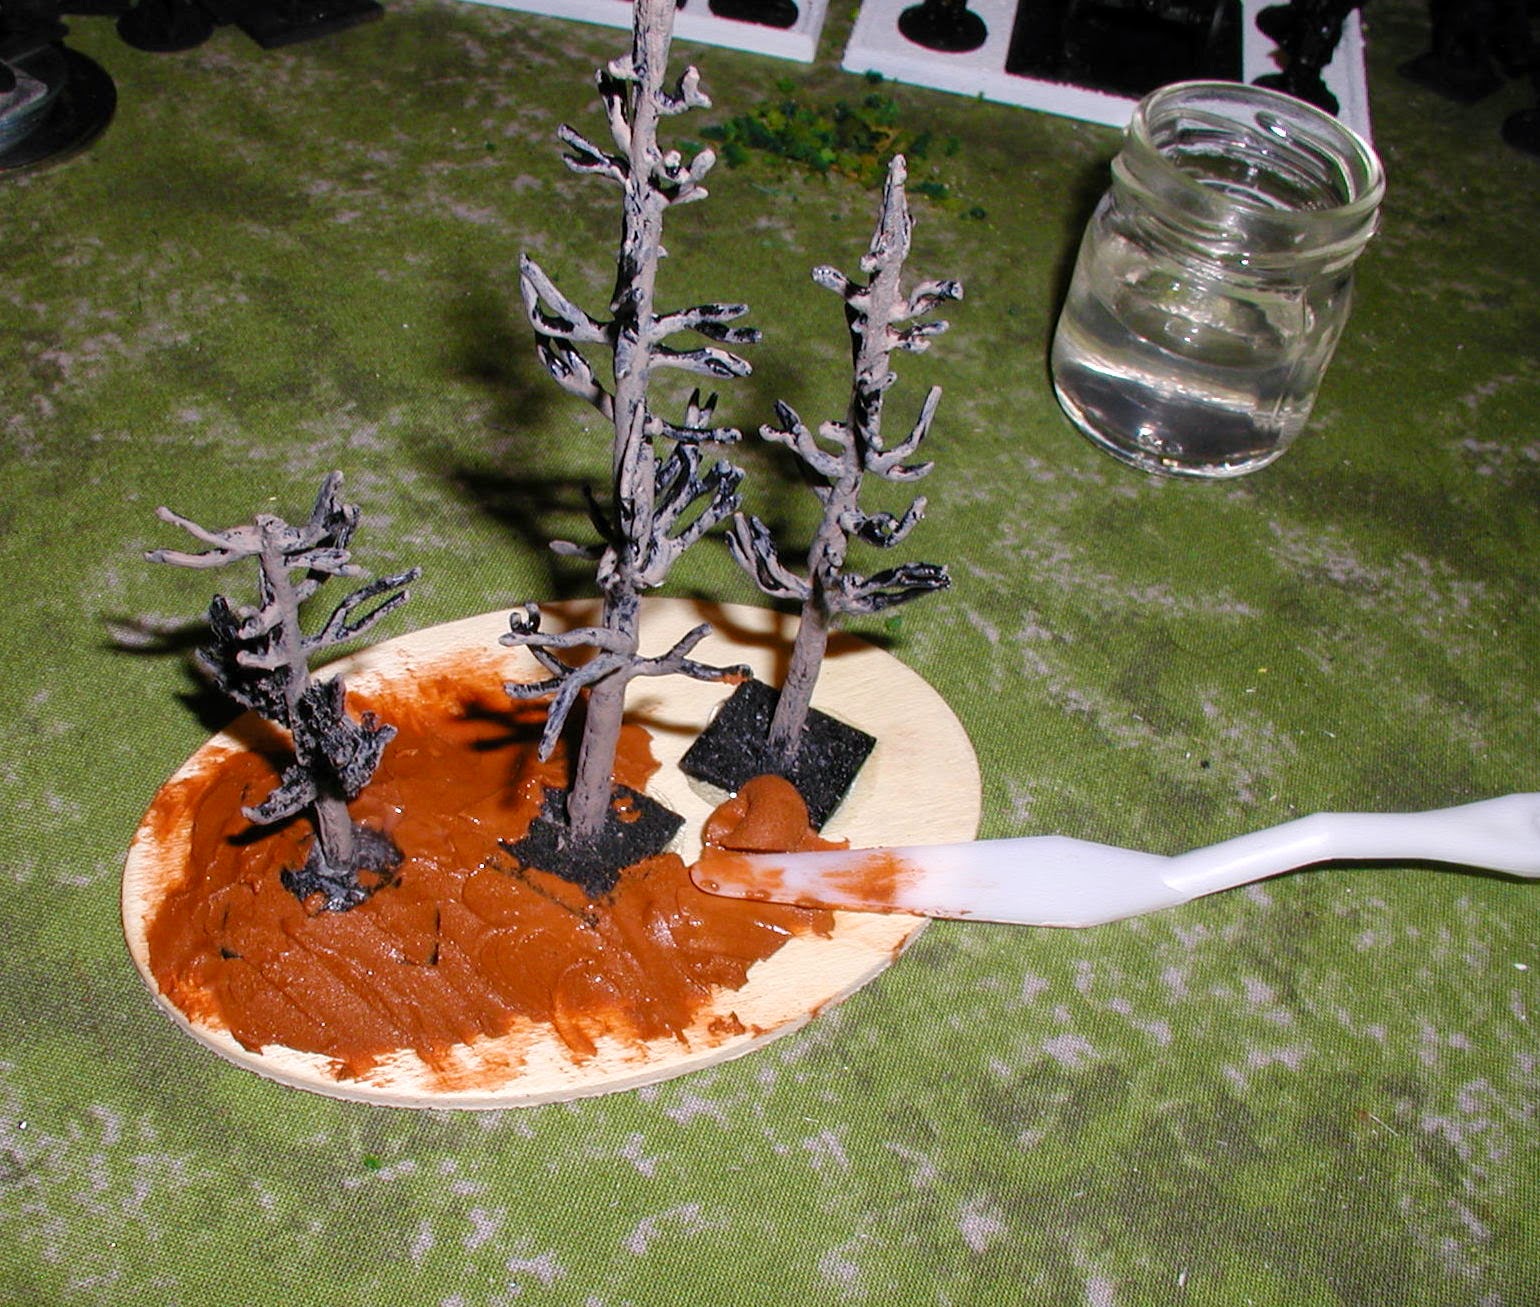
Using the Liquitex modeling paste and the trowel I disguised the obvious presence of tape in the center, then glued the trees down with the Zap-a-dap-a-Goo. When that dried I used the white to touch up around the bases of the trees - covering up whatever color appeared on the edges.
At this point they are done and ready for use.

Anyone who has seen new snow has seen that the surface, unless disturbed, is very smooth. I'm content to not put a whole lot of work on these as they are intended for quick mass production and to cover a lot of real estate on the table.

For gaming purposes, and unlike the other winter trees seen on this blog, these trees can be moved through and I left enough room to place figures and/or hidden markers. 
One reminder that these trees were cheap was the observation that the "snow" material pops off easily - and I can even feel it shifting under my fingers when I handle them. I will hit them with Woodland Scenics terrain cement to lock all that down to ensure years of long use.
Hopefully this is helpful to the beginner who wants quick and sturdy tree bases for their winter layouts.

Questions, comments and followers are welcome and encouraged - plenty more to come.

Saturday, September 13, 2014

20mm Winter Themed Pine Trees Tutorial

I've had these scraps of trees for over 20 years and finally decided to do something permanent with them. Above is the result and this post explains how I made them.
Early on, I did endeavor to put some of these together but my modeling skills weren't so hot in those days. I had a couple that were painted and flocked properly, some were not primed but were flocked?! (flock on bare metal trees), some were primed but not flocked, most of them had a broken limb or two and a couple were even broken in half. Half were based individually on irregular shaped wood bases, many of which were now warped, that I had chopped up for that purpose and others had no base at all.  It was essential to force some order on to these. 

1)  I made up a dollop of 2-part epoxy and stuck them on small wooden square bases. All the baseless trees were then stuck in those balls, roughly shaped, with sloping edges. 

2)  I sprayed them all with a Krylon black, flock and all - not primer here. 

3) After all that dried, I sloppily picked out the trunks and branches with Folk Art - Mushroom. I was not concerned with covering every spot knowing I was going to reapply flock to those branches as well as apply the ice. NOTE: Don't use your fancy paints and primers for this kind of thing. 

4) In the final step you see below, I glued them down, base and all, on these eight lozenge shaped bases I picked up at Michael's with this wonderfully named Zap-a-Dap-a-Goo. This stuff stinks, and is toxic, but is really a nice product. It does leave strands if you are not quick in sharply jerking it away from the glued surface.
 
The tree on the right is an example of the ad hoc 2-part epoxy bases, the other two have their original bases from ages ago.

Texture Magic. Now I had to cover all those tall irregular shaped bases and blend those down into the surface of the bigger base. This stuff was old and VERY thick and I really had to push hard to even get small portions out of that tube.

Luckily, it thinned with water and was easily applied with a trowel.

Here's six of the eight done, you can see better here how I hid the bases underneath, and sloped down the texture magic.

I also had these tiny baseless trees from some long forgotten Christmas display. For variety, I prepped these up too, first spraying them with the Krylon black to get rid of that awful synthetic green color you can still see in the underside of some of them. Then from above I hit them with Rustoleum Textured White to frost them up.

Flock time!

I used the Zap-a-Dap-a-Goo again to apply the foliage material. I just looked at the Woodlands Scenic page and they did far less than I did. Mine actually look more like deciduous trees than the pine trees they are supposed to be. I decided to overlook that terrible fact for this project.
When those were done and dried, I used a large bottle of Delta Ceramcoat acrylic White to cover the brown and the entire surface of the bases.


(Weird that the shadows are rusty-brown instead of black - I can't explain it.)
From above, and from various angles, I misted everything with the same Rustoleum Textured White. I didn't want the paint to penetrate into the interior or underside much at all.

I drilled holes in which to insert the smaller pines.That's a metal sheet to protect the counter top.
For gaming purposes, these are to represent impassable woods. As such they need a lot of mess around the bases to indicate that. With more Elmer's, I added broken twigs, Woodland Scenic stumps (again painted with Folk Art - Mushroom), some leftover clump foliage and Winter Tufts from Silflor.

The snow on the stumps and logs was a 50/50 mix of the Delta Ceramcoat White and Elmers glue to get the height and volume. No snow flocking material anywhere on these.


It may seem that I did all these in a sitting or two but it was over the course of a month where I worked at it here and there. The bushes (at left) were glued down one day. Another day I soaked them with white glue to harden them. Then on another day I added the glue/paint mixture, heavily dry-brushing down the sides.

Though white glue dries clear, I did have to go back and paint it white under the logs as it was too distracting to see the gelatinous and shiny glue under them all.


I wonder if I shouldn't have applied that glue/paint mixture to the trees themselves but it would have taken ages and it looks enough like frosted pine needles that I'm disinclined to make the effort.
As I started this project I quickly became aware that these were relatively short trees for 25mm figures. Nonetheless, a relatively minor issue. That's the Warlord 25mm Cantiniere & Pack Mule set.

Random 25mm Foundry Opelchenie


15mm Old Glory French Artillery in Campaign Dress. I'm doing the 1812 Russian Retreat in two scales: a 15mm game for Empire and and 25mm skirmish game. These trees will serve for both of course.


There is a companion tutorial on winter trees I bought at Walmart that was a far simpler project.

Thanks for looking. Questions, comments and followers are welcome and encouraged!